Astrophotography is amazing. The photos of the stars catch the attention of people around the world. There is something really special about it and just recently I’ve experienced how wonderful it is. I’m not a photography expert, therefore, all I’m writing in this post is for non-professionals. If you have always wanted to photograph the night sky this post is for you! A month ago I had no idea how to do it and today, here I am, showing you the pictures brought from Sardinia. Thus, here are a couple of tips and tricks on how to photograph night sky.
There is more!
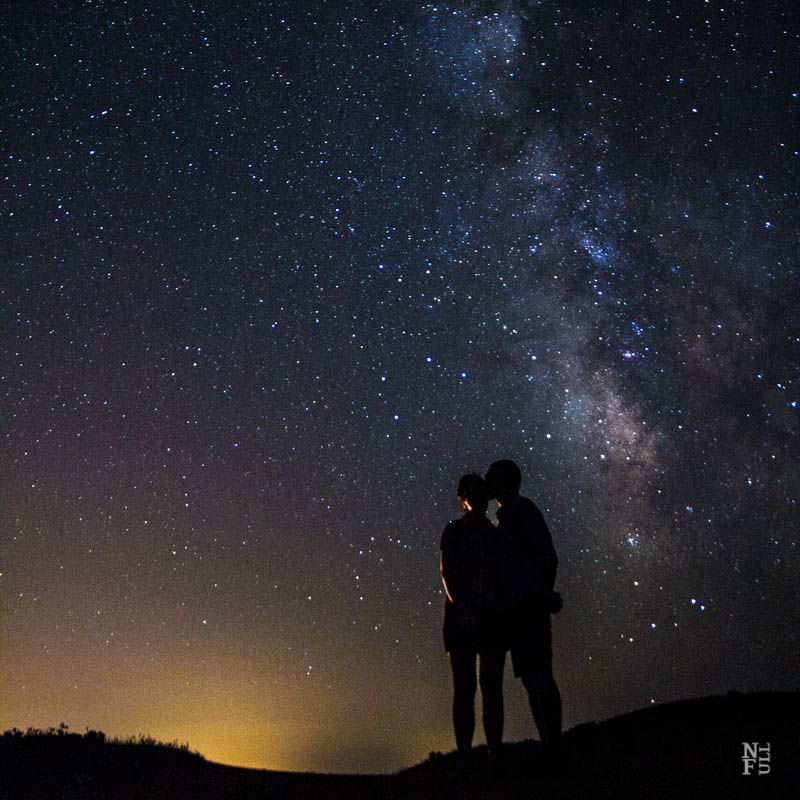
In this post, I am going to share practical info and tips on how to photograph a night sky. The picture you see above has been featured by Lonely Planet, and here is why this picture has been selected:
Why we like it: How could you not? The brilliant night sky, the glowing embers of light at the bottom of the frame, the romantic silhouette of the couple (who, expertly aren’t dead centre, but slightly positioned to the right of the frame). A winning combination, especially considering how hard it can be to shoot a crisp image with such low light.
The time
You need a lot of time. Seriously, it took me and two of my friends at least three nights before we were happy about the results. Thus, the patience is everything. The pictures you see are the final result of hours spent at the beach of Capo Pecora and in front of the computer. There is the good news too: when you finally catch the idea it goes smoothly.
It is crucial to check information about the visibility of the Milky Way. The beginners should focus on Milky Way as this seems to be the easiest object to be photographed. In Europe, August in a very good month to begin with. Last but not least: observe the moon and pick up the darkest day of the month. Full moon makes the night sky photo incredibly difficult.
The Place
It is important to go to a very dark place, far from the human activity areas. The darkest, the better. Obviously, professionals photograph the night sky in the cities but this is much more complicated so start from the easiest part. It will bring you a satisfaction and will encourage you to continue rather than discourage you from the very beginning. Sardinia was just perfect. There are many sites with no artificial light that spoils the effect so it was very easy to experiment with night sky photography a couple of nights in a row. Also, the weather was great so there were no clouds and the visibility was fantastic. New moon with no clouds is perfect.
The Gear
All pictures you see were taken with Canon EOS 60D with ordinary lens 18 – 35 mm and a simple tripod. As you can see, the part of the sky photographed is limited. If you wish to photograph large part of the sky you should have a wide field lens, like a fisheye lens. Also, the bigger the aperture (smaller the number) the better (2.8 is OK but 1.6 is even better).
The Composition
You might think the composition does not matter in the case of night photography. On the contrary: it matters a lot. We took dozens of pictures of stars with no earth in it and the effect was horrible. It’s much better to have a tree or a mountain in the view. The pictures with people are brilliant. The only thing is they should stay still for at least 25 seconds.
The Camera Settings
There is a simple rule that all professional and non- professional photographers are familiar with. So called the 600 Rule. You need to do some math here: divide 600 by your lens’ number (i.e. 24 mm), and the result is the exposure time, in this case it’s 25 seconds. If you keep the rule and these settings it guarantees that the photo will not be blurred, even though the Earth is moving. In 25 seconds the Earth will move about 0.1 degrees but the setting will keep the stars sharp.
ISO should be high. Check with your camera and chose the highest one that will still keep the picture sharp. In the case of the pictures you see here, ISO was 3600 but each number above 3200 should do the trick.
At the beginning, I’ve noticed that our pictures were blurred and we couldn’t figure out what was wrong with them for a couple of days. Eventually, we set the macro not to the fullest (infinity) but slightly lower than the infinity and it improved the quality of the picture significantly.
The Postproduction
This is probably the most important element of the whole process. Here is a short clip with basics of postproduction tips for the night sky.
Ans last but not least, I’m going back to Italy soon. I’ll be participating in a series of events organized by Alessandra from Settimana del Buonvivere. I can’t wait to taste the delicious food of Romagna, visit the historical sites and enjoy some of the most interesting trekking paths in the area. Stay tuned! More is coming!


